Fixing a Damaged Toilet Flange - Tips for Restoration
Fixing a Damaged Toilet Flange - Tips for Restoration
Blog Article
The content listed below involving How to Repair a Toilet Flange is definitely captivating. Don't miss out on it.
Intro:
Recognizing the Importance of a Toilet Flange:
In the world of plumbing, the often-overlooked bathroom flange plays a crucial role in making sure the smooth procedure of your shower room components. As an important connector between your commode and the underlying drain, the bathroom flange works as the unsung hero of your plumbing system. Without this durable part, your toilet would be prone to instability and leakages, potentially leading to expensive fixings and hassle. As a result, comprehending the relevance of a properly set up and kept bathroom flange is extremely important for any home owner starting plumbing projects or addressing repair work requirements.
Why Proper Installation and Maintenance Matter:
Appropriate setup and careful upkeep of the bathroom flange are vital for securing the stability of your plumbing infrastructure. A carefully installed flange not just anchors your bathroom securely in position however likewise develops a bulletproof seal, warding off the perils of leaks and smells. By accepting a proactive method to flange maintenance, you can minimize the risk of disruptive plumbing issues and protect the serenity of your house environment. Throughout this insightful overview, we'll untangle the complexities of bathroom flange setup and repair work, empowering you with the understanding and knowledge to browse these vital tasks expertly.
Finest Practices When Installing a Toilet Flange:
Making sure a smooth toilet flange setup needs adherence to a collection of finest practices that ensure longevity and performance. Begin by thoroughly assessing your tools and products, ensuring you have the essential tools for the work ahead. Selecting the appropriate flange product, whether PVC, ABS, or cast iron, is extremely important, as it determines the longevity and efficiency of your plumbing component. Furthermore, examining existing plumbing problems, such as looking for damage or rust, is necessary for preemptively resolving prospective problems and guaranteeing a smooth setup process. By taking on these primary steps, you established a strong foundation for an effective toilet flange installation, reducing the likelihood of future concerns and assisting in long-term upkeep.
Once properly prepared, wage the careful removal of the old flange, adhering to a methodical method to prevent triggering damage to surrounding parts. Employ strategies tailored to attend to stubborn or rusted flanges, guaranteeing their swift and secure elimination without compromising the integrity of the surrounding plumbing framework. With the old flange eliminated, thoroughly install the new replacement flange, picking one that fits snugly and securely right into area. Correctly protecting the flange to the floor utilizing screws or adhesive is crucial, as it makes certain security and stops future leaks. By adhering to these best practices during the setup process, you lay the groundwork for a durable and reliable toilet flange setup that withstands the examination of time.
Setting Up a New Toilet Flange:
When mounting a brand-new commode flange, the very first step is to select the appropriate substitute for your plumbing arrangement. Think about elements such as the product of the flange, with alternatives consisting of PVC, ABS, or cast iron. PVC flanges are understood for their affordability and resistance to corrosion, making them a popular option for DIY fanatics. Abdominal muscle flanges use similar advantages to PVC but boast included longevity, making them suitable for high-traffic locations or commercial settings. Cast iron flanges, renowned for their toughness and durability, are optimal for installations where sturdiness is critical. Furthermore, ensure that the substitute flange is properly sized and fits well right into location to develop a water tight seal and protect against leakages.
Securing the Flange to the Floor:
Once you've selected the appropriate replacement flange, it's critical to secure it correctly to the flooring to make sure stability and prevent future issues. Begin by placing and straightening the flange appropriately over the drain, ensuring that it sits flush with the floor surface area. Depending on the kind of flange and your details installation preferences, you can protect the flange to the flooring making use of screws or sticky. If making use of screws, make certain to use corrosion-resistant alternatives to avoid rusting gradually. Additionally, adhesive can give a secure bond between the flange and the flooring, making sure a strong and trustworthy installation. By following these steps and taking the essential safety measures, you can mount a new bathroom flange with confidence, making sure a durable and leak-free plumbing component.
Ideal Practices When Repairing a Broken Flange:
Fixing a broken toilet flange needs thorough focus to detail and adherence to finest methods to guarantee a long lasting remedy. Begin by thoroughly evaluating the degree of the damages and determining the underlying cause, whether it be corrosion, splits, or misalignment. This assessment will assist your repair technique, enabling you to select one of the most suitable methods and materials for bring back the flange to its ideal condition. Additionally, consider the surrounding plumbing framework and flooring security to deal with any type of potential adding factors and protect against future issues from occurring. By carrying out a thorough analysis and analysis, you lay the groundwork for an efficient and long-lasting repair procedure that fixes the source of the trouble.
With a clear understanding of the flange's problem and the variables influencing its damage, wage the fixing process utilizing precision and care. Depending upon the seriousness of the damages, you may go with repair techniques such as epoxy putty, repair flange sets, or partial flange substitutes. Guarantee that the picked repair work approach effectively attends to the particular problems handy while preserving the architectural honesty and performance of the flange. In addition, take proactive actions to enhance the fixed flange and protect against future damages, such as applying sealer or waterproofing materials to secure against leaks and rust. By adhering to these finest techniques throughout the repair work procedure, you can recover your busted flange to optimal condition, ensuring the long-term dependability and performance of your plumbing system.
Kinds Of Toilet Flanges:
Comprehending the different sorts of toilet flanges is vital for picking the most ideal choice for your plumbing needs. PVC, ABS, and cast iron are among the usual products used in bathroom flange building and construction, each offering unique benefits and factors to consider. PVC flanges, recognized for their price and deterioration resistance, are favoured for their ease of installment and durability. Abdominal muscle flanges, similar to PVC in regards to affordability and ease of installment, are treasured for their robustness and resistance to effects. On the other hand, cast iron flanges, renowned for their extraordinary strength and durability, are usually liked for high-traffic areas or commercial setups where durability is extremely important. By acquainting yourself with the features of each material, you can make a notified choice when selecting a commode flange that lines up with your certain needs and choices.
Along with material factors to consider, toilet flanges additionally can be found in different design and styles to fit different plumbing configurations and installment preferences. Offset flanges, as an example, are developed to fit toilets mounted on floorings that are uneven or where the waste pipe is located off-centre. Similarly, repair service flanges, also known as fixing rings or spacer rings, are utilized to resolve concerns such as split or damaged flanges without the demand for considerable plumbing modifications. Additionally, adjustable flanges provide adaptability ready, enabling accurate positioning and fit throughout installation. By discovering the diverse series of commode flange kinds and designs readily available, you can select the choice that ideal fits your plumbing setup and installation needs, making certain a seamless and reliable remedy for your restroom components.
Specialized Options:
In addition to standard toilet flanges, there are specialized options readily available to deal with certain plumbing obstacles and installation preferences. One such choice is the offset flange, which is developed to fit commodes mounted on floorings that are not level or where the waste pipe lies off-centre. Countered flanges feature an unique layout that permits the toilet to be positioned at a mild angle, compensating for irregular flooring or misaligned plumbing links. This cutting-edge solution guarantees a secure and steady installment, eliminating the demand for expensive and taxing flooring leveling or pipe relocation. By incorporating a balanced out flange into your plumbing setup, you can overcome usual installation barriers and accomplish a professional-quality outcome with ease.
One more specialty option worth considering is the fixing flange, also known as a repair service ring or spacer ring. Repair flanges are especially designed to deal with concerns such as split or broken toilet flanges without the demand for considerable plumbing alterations. These flexible parts can be mounted directly over the existing flange, providing a durable and dependable base for securing the commode in position. Repair flanges can be found in numerous sizes and configurations to accommodate different flange sizes and installation needs, making them a hassle-free and economical solution for solving flange-related troubles. Whether you're managing a small flange repair or a more complicated plumbing concern, integrating specialized alternatives like offset and repair flanges can improve the installment procedure and make sure lasting performance for your bathroom components.
Final thought:
To conclude, understanding the art of commode flange installment and fixing is crucial for keeping a functional and leak-free plumbing system in your home. By understanding the significance of an appropriately mounted flange and adhering to best practices throughout the procedure, you can guarantee the long life and integrity of your shower room components. Whether you're choosing the ideal sort of flange, conducting repair work, or exploring specialty alternatives, focus to detail and thorough execution are crucial. Regular upkeep and proactive repairing can help stop pricey plumbing concerns and preserve the serenity of your house atmosphere. Equipped with the understanding and skills acquired from this extensive guide, you can take on commode flange installment and repair with self-confidence, equipping you to safeguard your plumbing system for several years to find.
How to Install a Toilet Flange on A Concrete Floor
Preparation in Installing or Replacing a Toilet Flange
Gloves Screwdriver Hacksaw or a power saw Measuring tape Putty knife Hammer New screws (if needed) New T-bolts (if needed) New wax ring (if needed) Remove the Old Flange
The first step is to remove the old flange. You can unscrew the bolts that hold the flange in place. If the bolts are rusted or stuck, you may need a grinder to get them out.
Once the bolts are out, you should be able to pull the flange out if needed. You can try prying it out with a screwdriver or a putty knife if it’s stuck.
Scrape off the Old Wax Ring
Now that the flange is out, you need to remove the old wax ring. You can do this by scraping it off with a putty knife. Be sure to get all of the wax off so that the new wax ring will adhere properly.
Clean the Area around the Drain
Once the wax ring is removed, you need to clean the area around the drain. This will ensure that the new flange is attached appropriately.
You can use a brush and some soapy water to clean the area. If there is any rust or build-up, you may need to use a power drill with a wire brush attachment to remove it.
Measure the Size of the Flange
Now that the area is clean, you need to measure the size of the flange. This will ensure that you get the correct size flange for your toilet.
Most flanges are either 3 or 4 inches in diameter. To measure the diameter, you will need to use a tape measure.
Select the Correct Size Flange
Once you know the diameter of the flange, you need to select the correct size. If you’re not sure which size to get, you can always ask a salesperson at the hardware store for help.
One way to ensure that you get the right size flange is to take the old one to the store. Just make sure that the old flange is clean and free of any wax or build-up.
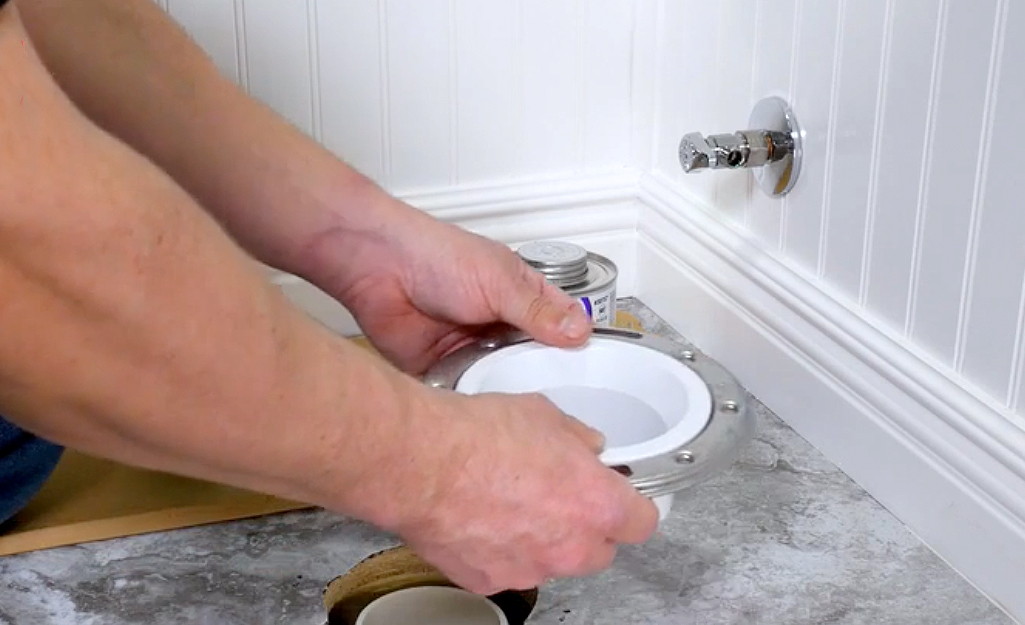
Set the Toilet Flange in Place
The next step is to set the new flange in place. You will need to align the flange with the drain to line up the bolt holes. It would help if you also considered the distance from the wall.
Most flanges are designed to be installed about 12 inches from the wall to the center of the flange. However, you may need to adjust this based on the size of your toilet. Our favorite flanges to install are twist in flanges which you can pick up from your local Home Depot. You can check them out here.
Drill Holes for the Screws
Once the flange is in place, you need to drill holes for the screws in the concrete. You will need to use a concrete drill bit that is slightly smaller than the screws.
The number of screws you need will depend on the size of the flange. Most flanges require four screws to hold them in place.
Install the Screws
Once the holes are drilled, you can install the screws. You will need to use a screwdriver to tighten them in place. Be sure not to overtighten the screws as this can damage the flange and may cause the toilet to leak from the base.
Place the New Wax Ring on the Flange
Now that the flange is installed, you need to place the wax ring on top. The ring should fit snugly around the flange.
If you’re not sure which size wax ring to get, you can always ask a salesperson at the hardware store for help.
Set the Toilet Bowl in Place
Now that the wax ring is in place, you can set the toilet bowl in place. You will need to align the bolt holes with the holes on the flange. Once the bowl is in place, you can start to tighten the bolts.
Connect the Water Supply Line
The final step is to connect the water supply line to the toilet. You will need to screw the line into the fitting on the bottom of the tank.
Once the line is tight, you can turn on the water supply and flush the toilet to check for leaks. If there are no leaks, then you’re done! You’ve successfully installed a toilet flange.
If you want to know more about the entire toilet installation process, from removing to installing a new toilet, you can check out our article about How to Remove a Toilet and Replace It With a New One.
Conclusion
Installing a toilet flange is a relatively easy do-it-yourself project. Just be sure to measure the flange and select the correct size. Also, you should remember is that the screws must be hand tight only; overtightening them may cause the flange to break.
However, if you have doubts about your plumbing skills, it’s always best to call a professional plumber to help you install your toilet flange or even your entire toilet. This can save you time, money, and headaches because they know how to do it quickly and efficiently.
If you live in Lower Mainland copyright and need a trustworthy and experienced plumber to install your toilet flange, Your Guy Plumbing is here to assist you 24/7. We offer toilet installation and repair, as well as other plumbing services to meet all of your needs.

I hope you liked our piece on Toilet Flange Repair. Thank you so much for finding the time to read our short article. If you please take a moment to share this page if you appreciated it. Many thanks for going through it.
Article Report this page